In the navigation tree, navigate to the
Triggers folder by expanding
Database > My Systems > Catalogs > Schemas > Tables.
Right-click on the table or the
Triggers folder and select
Create Trigger.
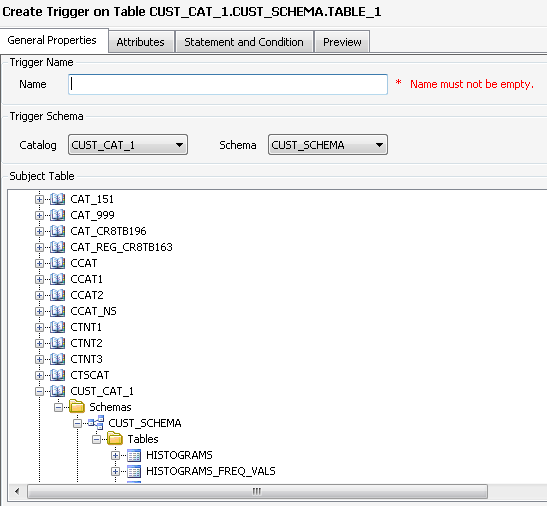
The trigger is created in the schema of the subject table from where you launch the
Create Trigger on Table wizard. To create the trigger in a different catalog or schema, select another catalog and schema from the
Catalog and
Schema drop-down menus in the
Trigger Schema section of the
General Properties tab. To create the trigger on a different subject table, select another table in the navigation tree that appears in the
Subject Table section of
General Properties tab. For more information on tables, see
Managing tables and their properties.
Create Trigger
Click the
General Properties tab and enter the following:
Name of the trigger in the
Name field.
Select the
Catalog and
Schema in which the trigger will reside in
Trigger Schema section.
Select the subject table on which the trigger is to be created in
Subject Table section.
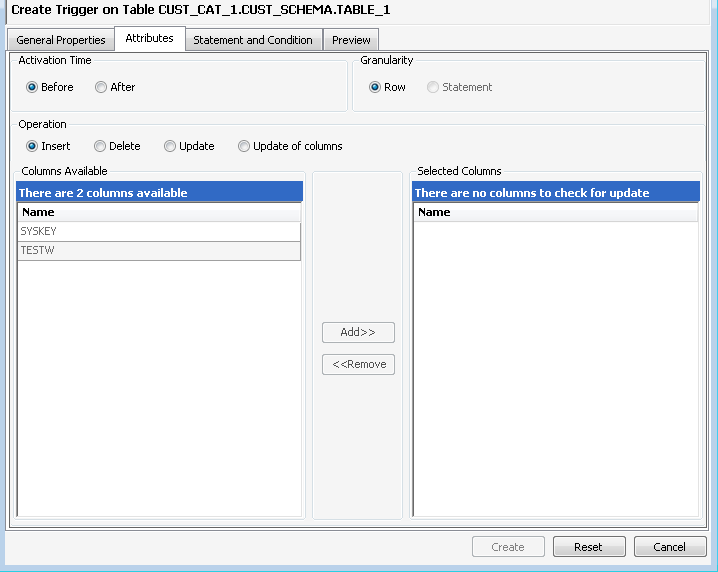
Click the
Attributes tab and enter the following:
Select the desired
Activation Time option.
Select the desired
Granularity option.
Select the desired
Operation option.
If you have selected
Update of columns option in
Operation, then select columns from the
Columns Available grid and click
Add.
The selected columns are moved to the
Selected Columns grid.
To remove columns, select columns from the
Selected Columns grid and click
Remove.
Click the
Statement and Condition tab and enter the following:
Enter
New as and
Old as values in
Referencing section.
The values represent the following:
For Row triggers, the correlation name of the old or new row acted upon by the trigger.
For Statement triggers, the table alias name of the old or new table acted upon by the trigger.
Enter the SQL statement in the
Triggered Statement text box.
Enter the condition that activates the trigger in the
Search Condition text box.
Optional. Click
Preview.
The DDL statement is displayed in the
Preview tab. MXDM displays an error message if any required information is missing or invalid in other tabs. You cannot enter any information in this tab.