You can grant the following privileges on a table to specific users: select, insert, delete, column reference, and column update.
Procedure
Log on to the NonStop SQL/MX Database Manager.
To grant privilege on a table, log in as the owner of the table, the security administrator, a user with grant privileges, or as
SUPER.SUPER user if the Security Administrator group is empty.
In the navigation tree, navigate to
Schemas folder by expanding
Database > My Systems > Catalogs > Schemas.
Expand
Tables folder and select the table on which you want to grant privileges.
Right-click and select
Grant/Revoke Privileges.
The grant/revoke privileges options appear in the right pane. The
Grant option is selected by default.
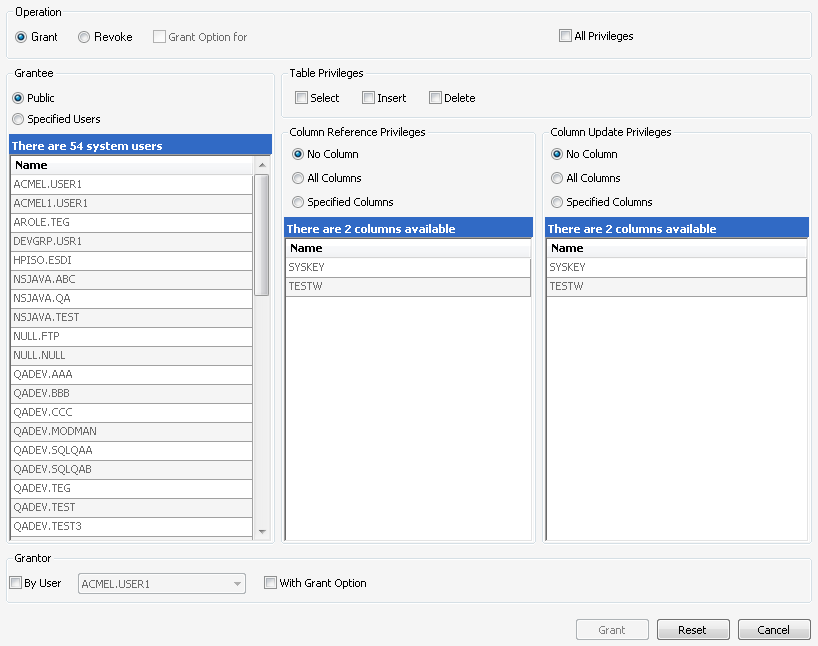
Granting privileges on a table
In the
Grantees section, select
Public to grant privileges to all users.
Or, select
Specified Users to grant privileges to specific users.
If
Specified Users option is selected, the user grid is enabled.
Optional. In the user grid, press
Ctrl and click on the desired user names to select users.
Optional. In
Grantor section, select
By User option and select the user name in the corresponding drop-down menu to grant privileges on behalf of another user.
Optional. Select
With Grant Option to grant privileges and allow the grantees to grant the selected privileges to other users.
Optional. In the
Operation section, select
All Privileges check box to grant all privileges.
If the
All Privileges option is selected, then the options in the
Table Privileges,
Column Reference Privileges, and
Column Update Privileges sections are disabled.
Select the desired options in the
Table Privileges section.
The available options are
Select,
Insert, and
Delete.
In the
Column Reference Privileges section, select one of the following options:
Select
All Column to grant reference privilege on all columns.
Select
Specified Columns to grant reference privilege on specific columns.
If the
Specified Columns option is selected, then the list of columns is enabled.
Press
Ctrl, and click on the desired column names to select columns.
Selecting the
No Columns option does not grant reference privileges.
In the
Column Update Privileges section, select one of the following options:
Select
All Column to grant update privilege on all columns.
Select
Specified Columns to grant update privilege on specific columns.
If the
Specified Columns option is selected, then the list of columns is enabled.
Press
Ctrl and click on the desired column names to select columns.
Selecting the
No Columns option does not grant update privileges.