To create a stored procedure in Java (SPJ), log in as the owner of the schema that contains the procedure or as
SUPER.SUPER user.
Procedure
Log on to the NonStop SQL/MX Database Manager.
In the navigation tree, select
Database > My Systems > Catalogs > Schemas.
Right-click on the schema or the
Procedures folder and select
Create Java Procedure.
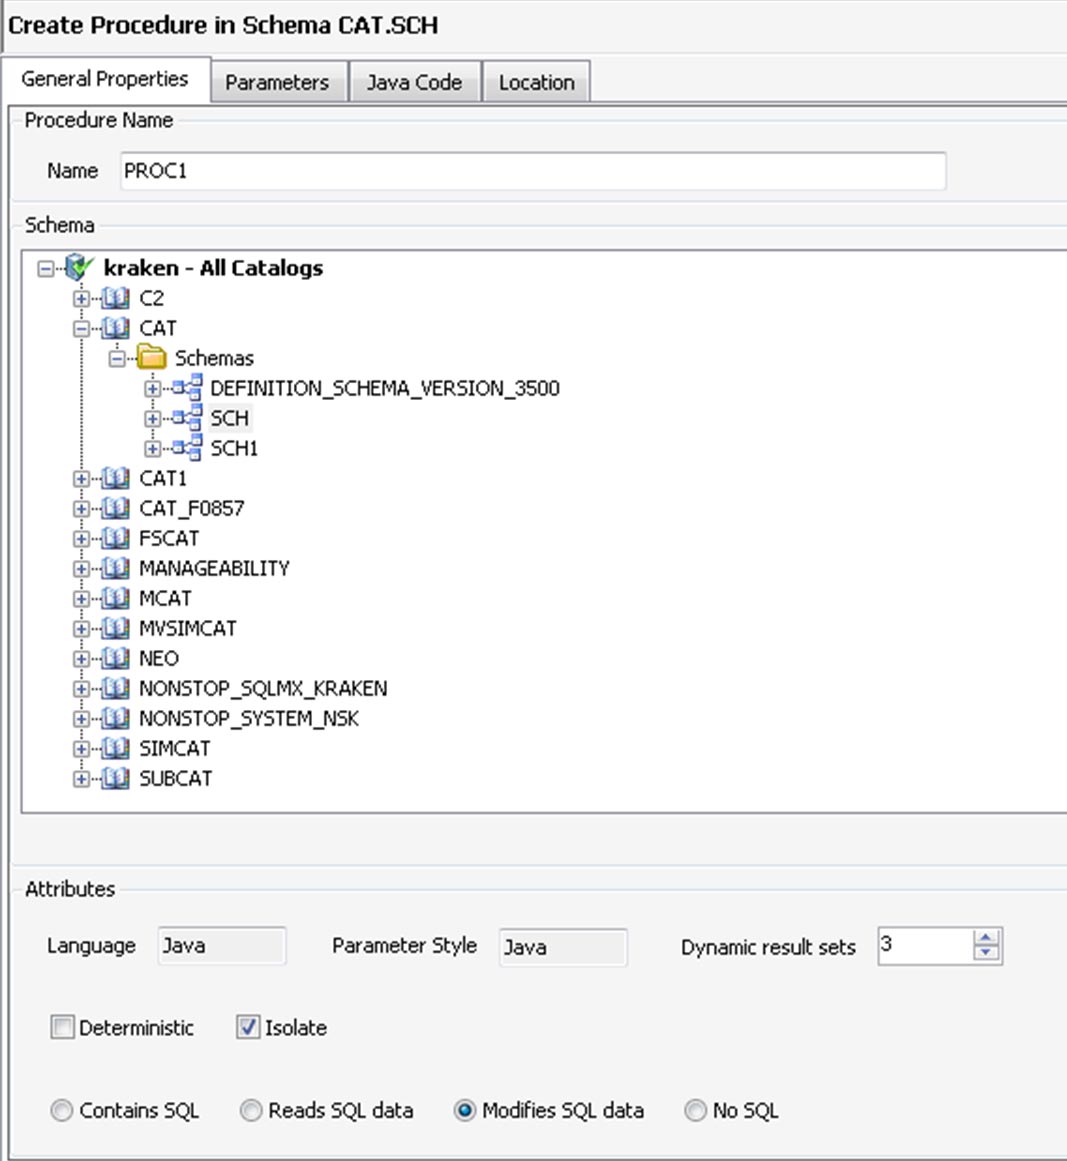
Click the
General Properties tab.
Create Procedure in Schema
Enter the name of the SPJ.
Select the schema on which the SPJ is to be created in the
Schema section.
By default, the schema from where you launched the
Create Java Procedure wizard is selected. To create the SPJ in a different schema, select another catalog and schema from the navigation tree.
In the
Attributes section:
Specify the
Dynamic result sets value.
Select
Deterministic or
Isolate.
This value specifies whether the SPJ always returns the same values for OUT and INOUT parameters for a given set of argument values (DETERMINISTIC) or does not return the same values (NOT DETERMINISTIC).
Select one of the following SQL access modes:
Contains SQL
Modifies SQL data
Reads SQL data
No SQL
For more information on access modes, see
HPE NonStop SQL/MX Reference Manual.
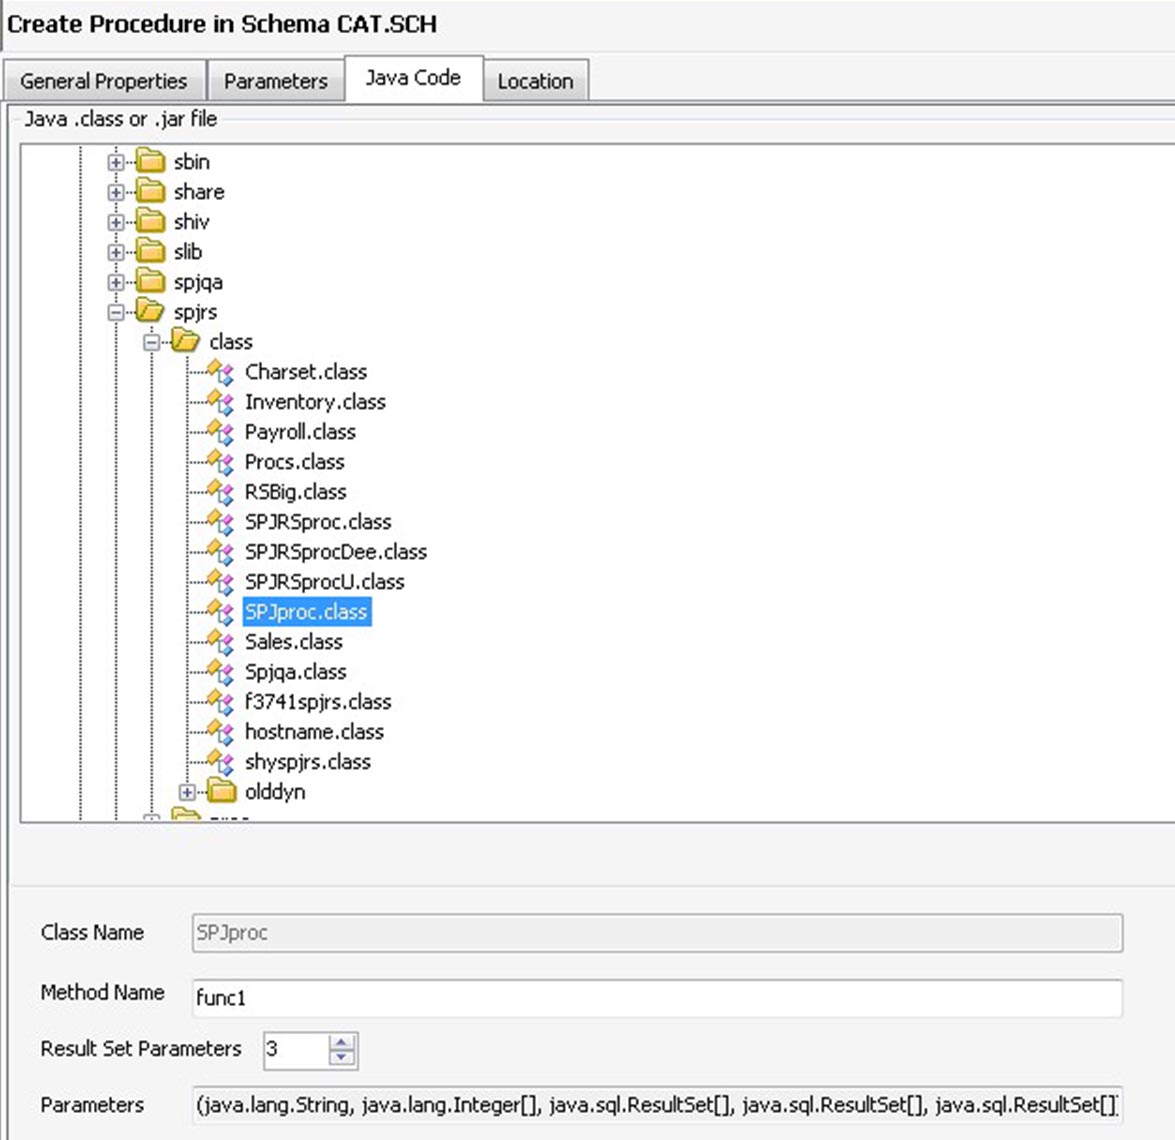
Select the required file in the
.class or .jar navigation tree.
The Java method must exist in the
.class or
.jar file in the OSS directory. For more information on Java method, see the
SQL/MX Guide to Stored Procedures in Java.
If you select a
.jar file, enter the class name.
Enter the Java method name.
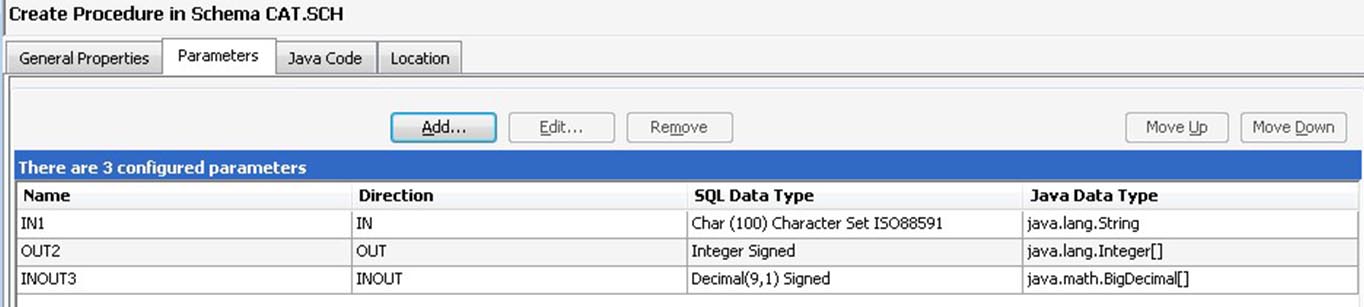
The parameters selected in the previous tab are displayed in the Parameters field.
Specify the number of
java.sql.ResultSet[] parameters to be added in
Result Set Parameters using the up and down arrows.
This is an optional field used to create a stored procedure with result sets. The default value for
Result Set Parameters is 0. The maximum value is 255.
Click the
Location tab.
Select the node on the Expand network where the Guardian file must reside from the
System drop-down list.
Select the data volume for the guardian file in the audited volumes table.
Select
Let SQL/MX choose the file name to let SQL/MX determine the name of the physical file.
Or, select the adjacent option and enter the file name in the corresponding field.