The Application Manager is a component on the controller that supports default and add-on network services, and enables installing, upgrading, enabling (starting), disabling (stopping), and uninstalling SDN applications.
When controllers are operating in a team, actions performed on one controller are propagated to the other controllers in the team. Actions you select in the Applications screen for one controller, such as Install, Enable, and Disable, are propagated to the other controllers.
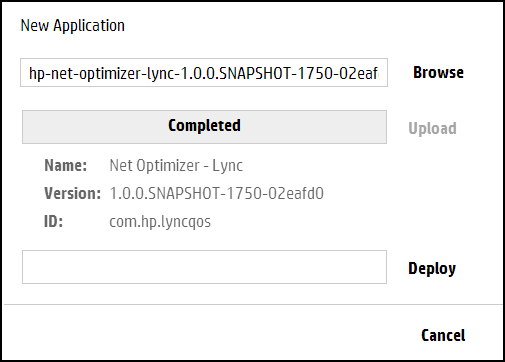
Any application to be installed on the controller must meet the following requirements:
-
The zip file must be accessible from the browser UI's file manager (or downloadable from the App Store).
-
It must contain an application descriptor file containing key value pairs of the attributes associated with the application, including all mandatory attributes.
-
If jar signing checking is turned on, the application zip files must be signed as well.
Applications you purchase from Hewlett Packard Enterprise or the Hewlett Packard Enterprise SDN App Store meet these requirements.
For information about developing applications that meet these requirements, see the HPE VAN SDN Controller Programming Guide.
| Screen component | Description |
|---|---|
| Refresh | Reloads the view. |
| New |
Installs an application on the controller. |
| Upgrade |
Installs an upgrade to an application that has already been installed on the controller. |
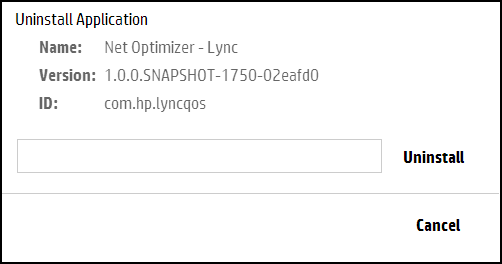
| Uninstall |
Removes an application from the controller. |
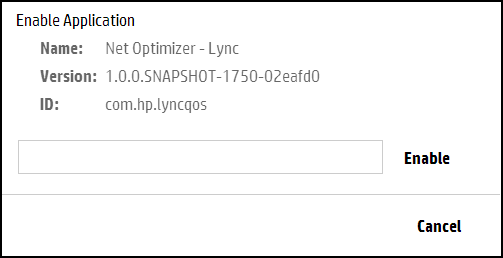
| Enable |
Starts or allows an application to continue operations on the controller. |
| Disable |
Stops or prevents an application from operating on the controller. |
| Name |
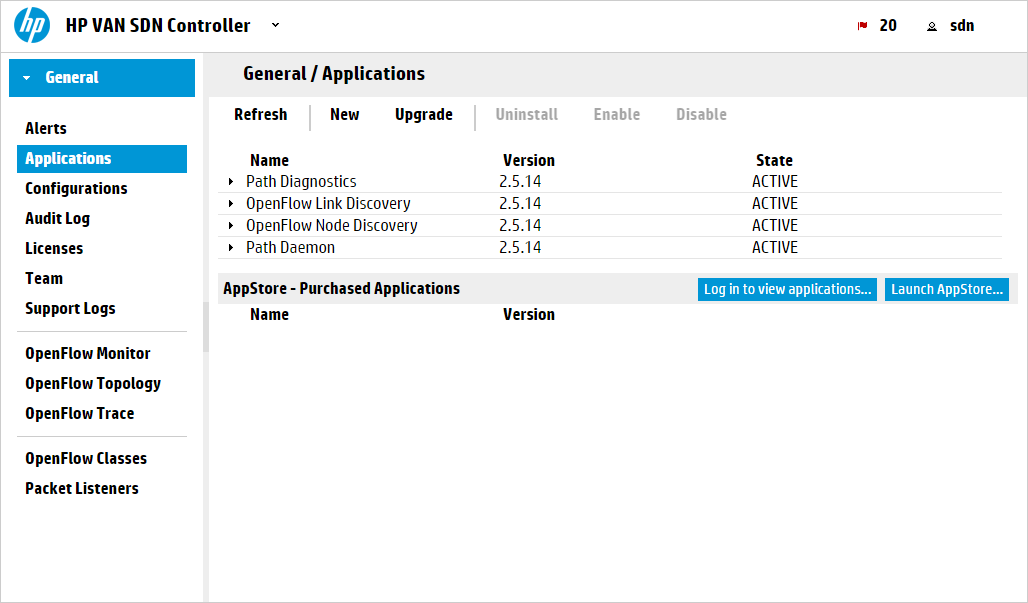
The name of the application. The following core embedded applications that come with the controller are listed by default on the Applications screen:
These are the only embedded applications you are allowed to manage using the UI. Other embedded applications are not listed because they should not be disabled or uninstalled. For information about embedded applications, see Understanding the controller architecture. If you have installed any of Hewlett Packard Enterprise’s SDN applications, such as HPE Network Protector, these applications will also be listed. |
| Version |
The version number of the application. |
| State |
The most common states are |
| AppStore � Purchased Applications |
The name and version number of SDN applications purchase from the Hewlett Packard Enterprise SDN App Store. |
| Log in to view applications |
Allows you to log with your HPE Web ID to view applications. |
| Launch AppStore |
Launches the Hewlett Packard Enterprise SDN App Store website. |
From the App Store, you can purchase and download applications for your controller.
In the case of a web proxy, you need a proxy configuration to connect to the App Store portal. To set the proxy, in the /etc/init/sdnc.conf file, replace c1, c2, c3, and team with the controller IP addresses and the team IP address (when applicable):
env JAVA_OPTS="-Xms512m -Xmx4096m -XX:MaxPermSize=512m -Dhttps.proxyHost=my-web-proxy-Dhttps.proxyPort=my-web-proxy-port-Dhttp.nonProxyHosts=127.0.0.1|localhost|c1|c2|c3|team"
Command Example
env JAVA_OPTS="-Xms512m -Xmx4096m -XX:MaxPermSize=512m -Dhttps.proxyHost=web-proxy.test.com -Dhttps.proxyPort=8088 -Dhttp.nonProxyHosts=127.0.0.1|localhost|11.152.121.172|11.152.126.13|11.152.127.5|11.152.123.6"
You must update the /etc/init/sdnc.conf file on each controller and then restart the controllers for these changes to take effect.
If you are downloading a signed application from the App Store, the JAR signing requires a trusted certificate in the sdnjar_trust.jks file even if the certificate is trusted in the JAVA cacerts keystore. For details, see Adding certificates to the jar-signing truststore
Any application in the proper format can be added to the controller (see About the application manager).
To use curl commands and the REST APIs to complete this task, see curl commands.
After you complete this procedure:
Use this procedure to install either a new application or a new version of an existing application on the controller using the UI.
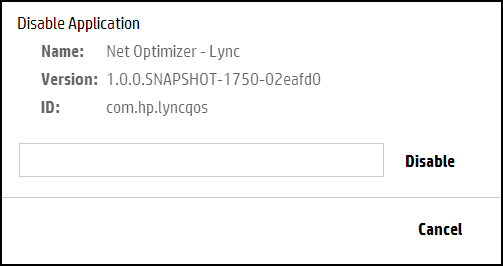
This procedure temporarily stops an active application from servicing requests, but retains the application on the system. The application remains present on the system and can be restarted when needed. (The application does not automatically restart when the controller restarts.)
To use curl commands and the REST APIs to complete this task, see curl commands.
This procedure completely removes an application from the controller. To later restore the removed application, see Adding or upgrading an application.
To use curl commands and the REST APIs to complete this task, see curl commands.
In the default state, or when an application has been started, it is in the ACTIVE state and is servicing requests. Application states include the following:
Application States
| State | Description |
|---|---|
|
ACTIVE |
The application is running and servicing requests. |
|
STAGED |
A new application has been downloaded to the controller and is ready to be installed. |
|
UPGRADE_STAGED |
A new version of an existing running application has been downloaded to the controller and the new version is ready to be installed (upgrade/downgrade). |
|
INSTALLING |
A transitive state indicating a new application is in the process of being installed. |
|
UPGRADING |
A transitive state indicating the existing application is being stopped and a new version of the application is being installed. |
|
CANCELING |
A transitive state indicating a non-installed version of an application is being deleted from the controller. |
|
DISABLING |
A transitive state indicating the application is in the process of being disabled (stopping). |
|
DISABLED |
The application is disabled (stopped). A disabled application is not automatically started when the controller restarted. |
|
ENABLING |
A transitive state indicating the application is being started. |
|
UNINSTALLING |
A transitive state indication an application is being stopped and completely removed from the controller. |
|
RESOLVED |
The application is stopped and not servicing requests. An application can only be in this state when it is stopped externally to the SDN Controller (e.g. the virgo console). |
Error condition management
| State | Description |
|---|---|
|
NEW > STAGED NEW > UPGRADE-STAGED |
If an error condition occurs when staging the application, then it actually does not exist. (Error conditions in this stage clean up after themselves.) |
|
STAGED > ACTIVE |
If an OSGi deployment exception is encountered, the application is moved to DISABLED if it fails to deploy as it is. If a File I/O or URI exception is encountered, the application remains in the installing state. |
|
UPGRADE-STAGED > ACTIVE |
If an exception is encountered (OSGi deployment, File I/O, or URI), rollback attempt is made, as listed below. (Depending on the original exception, not all options may be possible).
|
|
ANY STATE > UNINSTALLED |
If any exception is encountered, the application remains in UNINSTALLING state |
|
ANY STATE > DISABLED |
If an exception is encountered, remains in DISABLING state. |
|
DISABLED > ENABLED |
If an OSGi deployment exception is encountered, the application is moved to the DISABLED state if it fails to deploy as it is. If any other exception is encountered (file I/O or URI), the application remains in the ENABLING state. |
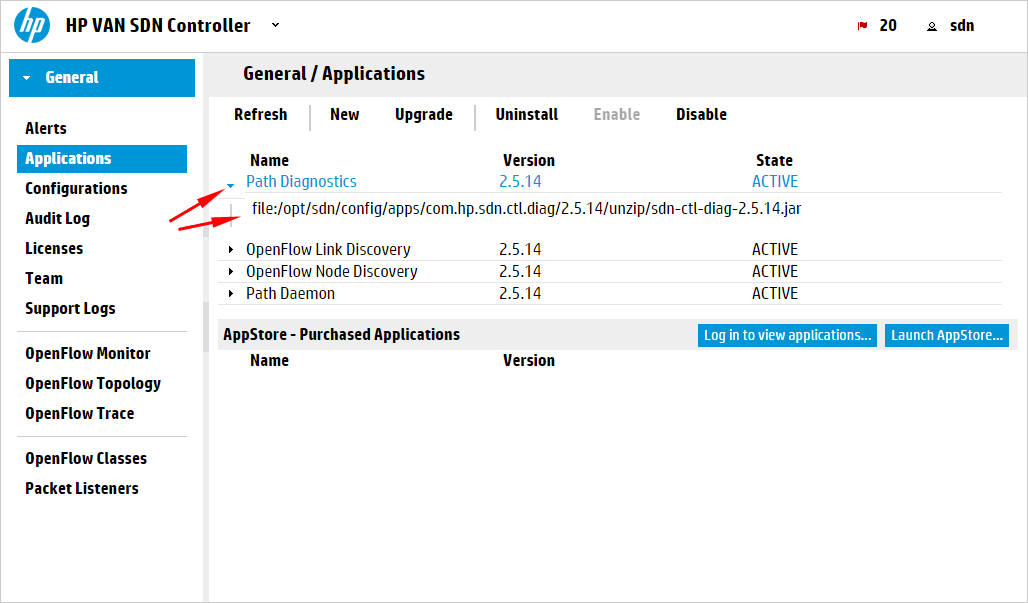
To access the link to the OSGi artifacts for an application, click on the bullet for the application in the web GUI. For example, clicking on the bullet for the Path Diagnostics application displays the link to identity of the associated OSGi artifacts: