Creating a superuser
The SQL Server database has a default superuser named sa. To specify another user for database access during IMC installation, first create a login user and grant administrator privilege to the user on the SQL Server.
To create a superuser:
Select Start > SQL Server 2014 Management Studio.
The database login dialog box opens, as shown in Figure 47.
Figure 47: Login dialog box
Select SQL Server Authentication for Authentication, select a login username, enter the password, and then click Connect.
The Microsoft SQL Server Management Studio page opens, as shown in Figure 48.
Figure 48: Microsoft SQL Server Management Studio page
Expand the Security node in the navigation tree, right-click Logins, and select New Login from the shortcut menu.
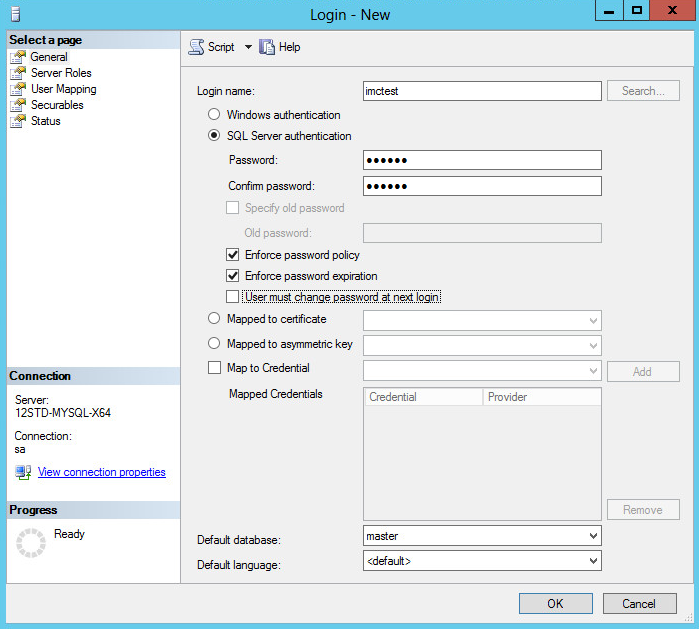
The Login - New page opens, as shown in Figure 49.
Figure 49: Adding a login user
On the General page, enter the login name, click SQL Server authentication, enter the password, and then clear User must change password at next login. This example uses imctest as the login name.
For IMC to correctly identify the password, make sure the password does not contain any of the following characters:
Left angle racket (<)
Right angle bracket (>)
Vertical bar (|)
Tab (\t)
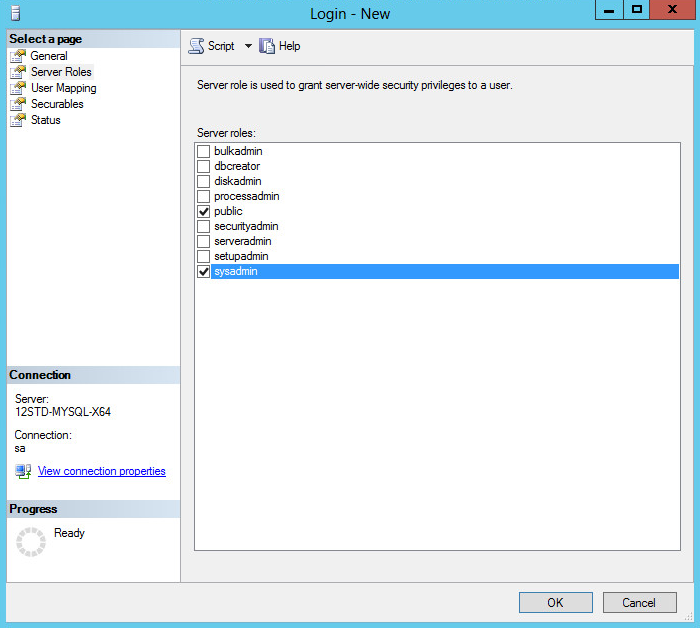
From the navigation tree, select Server Roles.
Figure 50: Setting server roles
Select public and sysadmin, and then click OK.
The user is granted database administrator privileges and is displayed under the Security > Logins node in the navigation tree of Microsoft SQL Server Management Studio, as shown in Figure 51.
Figure 51: Viewing the new user