Modifying the self-service login page for PCs
Click the User tab.
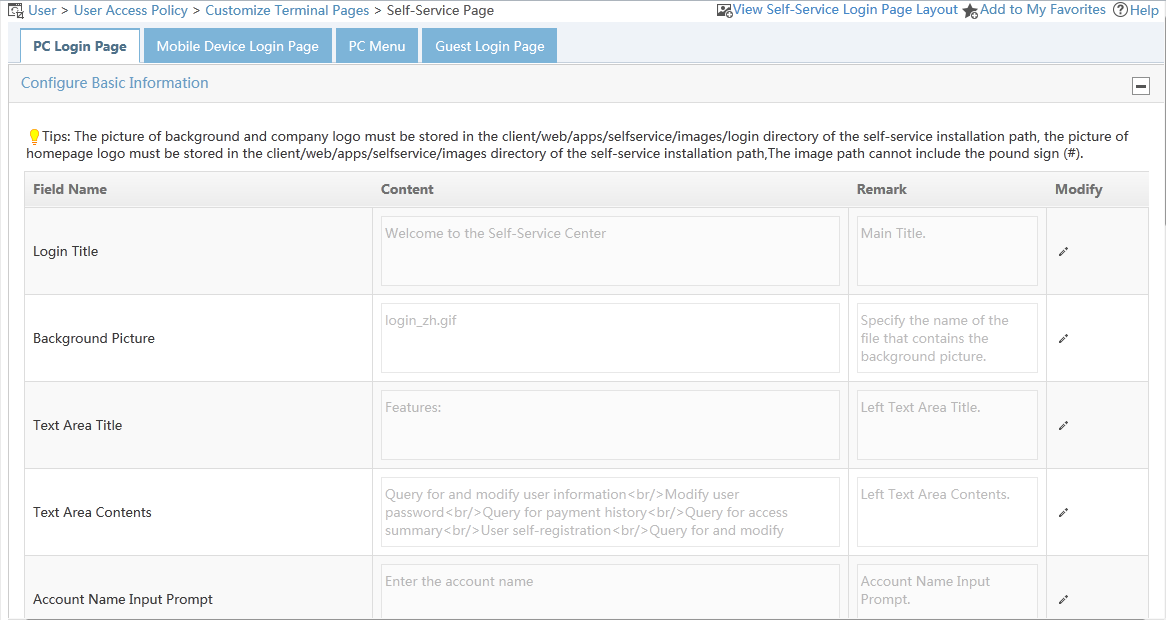
From the navigation tree, select User Access Policy > Customize Terminal Pages > Self-Service Page.
Click the PC Login Page tab.
Configure basic information:
Click the Modify icon
 for a field to enter editor mode.
Enter the content and remarks of the field. The field content will be displayed on the self-service login page.
In the Modify column, click
 or
or  to save or cancel your modification.
Figure 118: Configuring basic information
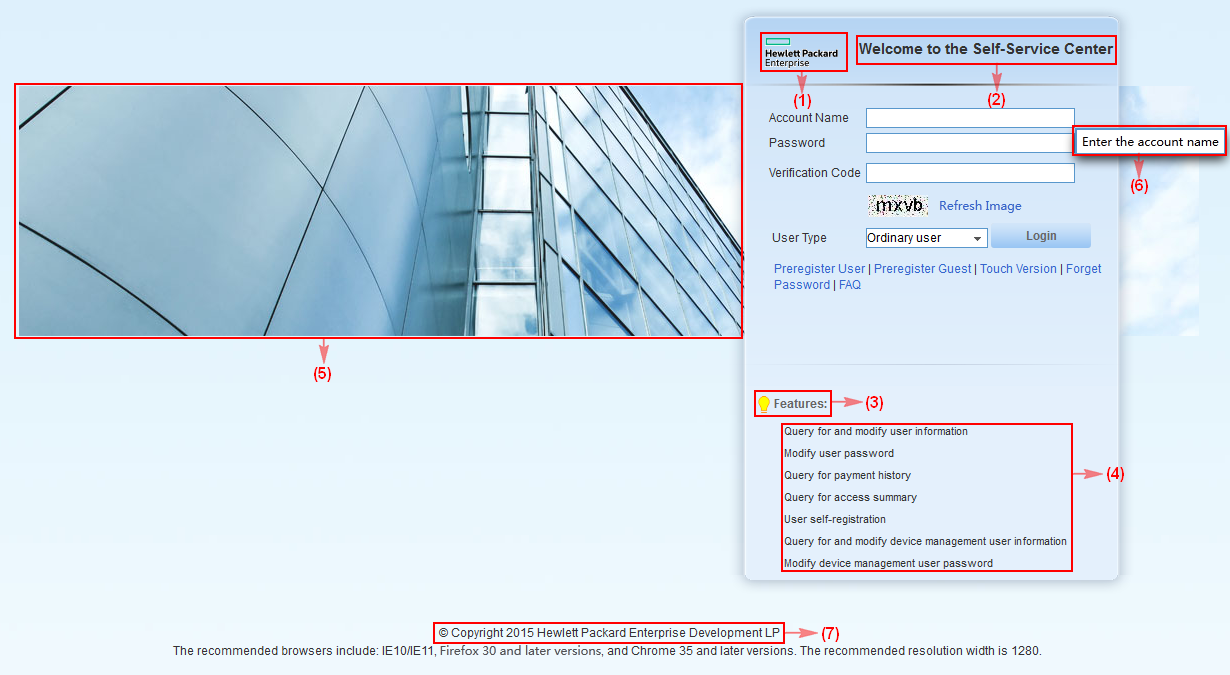
Figure 119 is a sample self-service login page. From this page, you can view where the basic information fields are displayed.
Login Title—Displayed at (2).
Background Picture—Displayed at (5). The picture must be stored in the /client/web/apps/selfservice/images/login/ directory of the self-service installation path on the server.
Text Area Title—Displayed at (3).
Text Area Title—Displayed at (4).
Account Name Input Prompt—Displayed at (6). The prompt message is displayed when you place your cursor over the Account Name field on the self-service login page.
Company Logo—Displayed at (1). The picture must be stored in the /client/web/apps/selfservice/images/login/ directory of the self-service installation path on the server.
Homepage Logo—Logo displayed on the self-service homepage. The picture must be stored in the /client/web/apps/selfservice/images/login/ directory of the self-service installation path on the server.
Company Website—URL that you are redirected to after clicking the company logo (1).
Complete Copyright Information—Displayed at (7).
Figure 119: Self-service homepage
Configure links:
Click the Modify icon
for a link to enter editor mode. Figure 120 shows the positions of the links on the self-service login page.
Figure 120: Links on the self-service login page for PCs
Edit the following information for a link:
Display Name—Enter the display name of the link.
URL—Specify a URL for the link, except Forget Password, FAQ, and Touch Version links. For information about configuring user and guest preregistration pages, see "Managing and applying preregistration page sets."
Display—Select the option to display the link on the self-service login page.
In the Modify column, click
or to save or cancel your configuration.
When the Guest Preregister parameter is disabled in the guest service parameters, the Display parameter for the Guest Preregister link is disabled and cannot be modified. For more information, see "Configuring guest service parameters."