-
A software version for the switch has been stored on a USB flash drive. (The latest software file is typically available from the HP Switch Networking website at www.hp.com/networking/support.)
Syntax
This command automatically downloads a switch software file to primary or secondary flash. If you do not specify the flash destination, the USB download defaults to primary flash.
Example
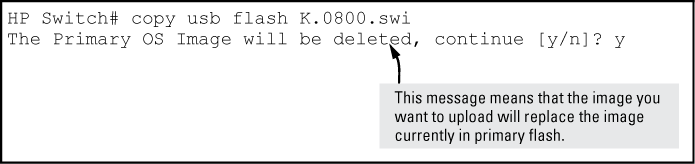
To copy a switch software file named k0800.swi from a USB device to primary flash:
-
When the switch finishes copying the software file from the USB device, it displays this progress message:
-
When the copy finishes, you must reboot the switch to implement the newly loaded software. To do so, use one of the following commands
Syntax
Syntax
-
To confirm that the software downloaded correctly, execute
show systemand check the Firmware revision line.
Syntax
Displays the status of the USB port. It can be enabled, disabled, or not present. (See show usb-port command output on version K.13.59 and later or show usb-port command output on version K.14.XX, depending on your version.)
Example
One of the following messages indicates the presence or absence of the USB device:
The reseat status messages can be one of the following (K.13.XX only):
The autorun feature works only when a USB device is inserted and the USB port is enabled.


The general process for using USB autorun is as follows (steps 1, 2, and 7 require an upcoming update to PCM+, as described above):
-
Create an AutoRun file using PCM+.
-
(If required) Enable the autorun feature on the switch (autorun is enabled by default unless an operator or manager password has been set—See Autorun and configuring passwords.)
-
(If the AutoRun file has been signed or encrypted) Enable secure-mode on the switch:
-
Insert the USB flash drive into the switch's USB auxiliary port.
The switch processes the AutoRun file automatically and writes a result (.txt) file and report (.xml) file back to the USB flash drive, reporting on the command operations that were executed.
-
Remove the USB device from the USB port.
The switch executes any post-commands, such as rebooting the switch to apply any configuration updates.
-
(Optional) Transfer the 'result file' and 'report file' to a PCM+-enabled computer for report checking.
Syntax
When executed from the configuration mode, enables or disables USB autorun on the switch.
Use the
encryption-keykeyword to configure or remove an encryption-key (a base-64 encoded string.) The encryption key is a prerequisite for enabling autorun in secure-mode. Encryption is regarded only when the AutoRun file is also signed by an authentic source.Use the
secure-modekeyword to enable or disable secure mode for autorun.
USB autorun helps ease the configuration of HP Switch switches by providing a way to auto-execute CLI commands from a USB flash drive. Using this solution, you can create a command file (also known as an AutoRun file), write it to a USB storage device, and then execute the file simply by inserting the USB device into the switch's 'Auxiliary Port.' The AutoRun file is executed automatically when autorun is enabled on the switch and can be designed for various purposes, such as to configure the switch, to update software, or to retrieve diagnostic logs for troubleshooting purposes.
The overall USB autorun solution requires the following components:
-
An HP Switch switch that can securely use USB autorun to load authorized configurations and write reporting information. This requires software versions K.13.01, T.13.01 or greater.
-
The network management application HP Switch Manager Plus (PCM+.) PCM+ is required to create a valid AutoRun file and to view the results after the file has been executed on the switch.
By default, the switch is unsecured when shipped (that is, USB autorun is enabled by default.) However, as soon as an operator or manager password is configured, autorun is disabled and must be re-enabled at the configuration level of the CLI before it can be used. The requirement to use PCM+ to create a valid AutoRun file helps prevent a nonauthorized command file from being created and processed by the switch.
In terms of physical security, access to the switch's console port and USB port are equivalent. Keeping the switch in a locked wiring closet or other secure space helps to prevent unauthorized physical access. As additional precautions, you have the following configuration options via the CLI.
You can verify autorun operations by checking the following items:
The following table shows LED indications on the Auxiliary Port that allow you to identify the different USB operation states.
| Color | State | Meaning |
|---|---|---|
| Green | Slow blinking | Switch is processing USB AutoRun file. |
| Green | Solid | Switch has finished processing USB AutoRun file. This LED state indicates the AutoRun file was successfully executed and the report files were generated. You can review the report files on a USB-enabled computer for more details. Upon removal of the USB device, the LED turns OFF. |
| N/A | Off |
Indicates one or more of the following:
If the USB device has just been removed from the port, the switch executes any post commands. |
| Amber | Fast blinking | Processing Error. The AutoRun file stops processing when an error is encountered (for example, no more disk space is available on the USB device to write the result and report files.) For more information on the error, remove the USB device and inspect its contents on a USB-enabled computer. |
The following files are generated during autorun operations and written to the USB flash drive:
-
Report files (.xml file)—show which CLI commands have been run. The file name includes a serial number and datetime stamp to indicate when and on which device the AutoRun file was executed.
-
Result files (.txt file)—contain the CLI output for each command that was run on the switch, allowing you to verify whether a command was executed successfully or not.
You can use autorun secure mode to verify the authenticity of autorun command files. Secure-mode is configured using the autorun secure-mode command and can be enabled under both of the following conditions:
There is an additional security option to install a valid key-pair for signing the result files that are generated during autorun operations. You can generate the key-pair on the switch using the crypto key generate autorun [ command.rsa]
|
|
|
![[NOTE: ]](images/note.gif) |
NOTE: You can also install the key-pair from a tftp server or via the USB port using the
|
|
|
-
Autorun is enabled by default, until passwords are set on the device.
-
To enable secure mode, both an encryption key and trusted certificate must be set.
-
If secure mode is disabled, the key-pair can be removed using the
crypto key zeorize autoruncommand. -
When installing the autorun certificate file and/or the other key files, the files must be in PEM format.
When an operator or manager password is configured on a switch, autorun is disabled automatically, and a message is displayed on the screen, as shown in the following example:
HP Switch# password manager
New password for manager: *****
Please retype new password for manager: *****
Autorun is disabled as operator/manager is configured.
After passwords are set, you can re-enable autorun as needed using the autorun command.
When using software version K.13.58, if the USB port is disabled (no usb-port command), the USB autorun function does not work in the USB port until the USB port is enabled, the config file is saved, and the switch is rebooted. The 5-volt power to the USB port remains on, even after the USB port has been disabled.
For software versions after K.13.58, the 5-volt power applied to the USB port is synchronized with the enabling of the USB port, that is, when the USB port is enabled, the 5 volts are supplied; when the USB port is disabled, the 5 volts are not supplied. For previous software versions, the power was supplied continuously. The autorun function does not require a switch reboot, but the USB device must be inserted at least once after the port is enabled so the switch recognizes that the device is present. If the USB device is inserted, and then the USB port is enabled, the switch does not recognize that a USB device is present.
For software versions K.14.XX, the USB port can be disabled and enabled without affecting the autorun feature. When the USB port is enabled, the autorun feature activates if a USB device is already inserted in the USB port.
Power is synchronized with the enabling and disabling of USB ports as described above for K.13.59 and later software.