Use Telnet or the WebAgent to access the Candidate if it has an IP address. Otherwise, use a direct connection from a terminal device to the switch's console port.
-
Display the Stacking Menu by selecting
Stackingin the console Main Menu. -
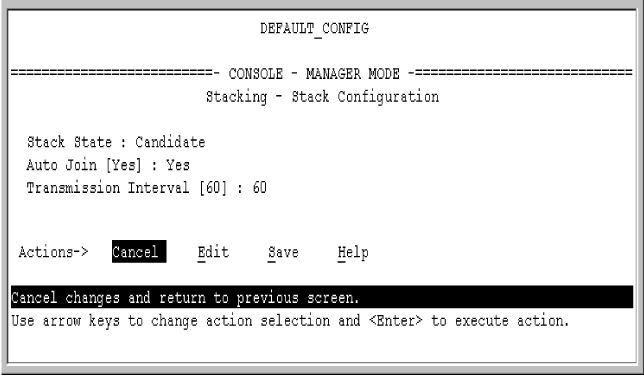
Display the Stack Configuration menu by pressing 3 to select
Stack Configuration. -
Move the cursor to the Stack State field by pressing E (for Edit).
-
-
To disable stacking on the Candidate, use the Space bar to select the
Disabledoption, then go to step 5.
![[NOTE: ]](images/note.gif)
NOTE: Using the menu interface to disable stacking on a Candidate removes the Candidate from all stacking menus.
-
To change
Auto JoinorTransmission Interval, use Tab to select the desired parameter, and:-
To change
Auto Join, use the Space bar. -
To change
Transmission Interval, enter the new value in the range of 1 to 300 seconds.
NOTE: All switches in the stack must be set to the same transmission interval to help ensure proper stacking operation. HP recommends that you leave this parameter set to the default 60 seconds.
-
Then go to Step 5.
-
-
Press S (for Save) to save your configuration changes and return to the Stacking menu.