Configuration procedure
Configuring the ACS
Log in to the ACS:
Launch a Web browser on the ACS configuration terminal.
In the address bar of the Web browser, enter the ACS URL and port number. This example uses http://10.185.10.41:8080/imc.
On the login page, enter the ACS login username and password, and then click Login.
Create a CPE user account:
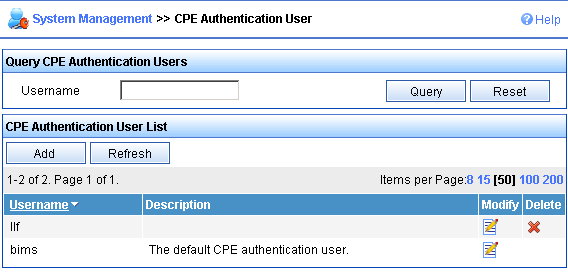
Select Service > System Management > CPE Authentication User from the top navigation bar.
The CPE authentication user configuration page appears.
Figure 60: CPE authentication user configuration page
Click Add.
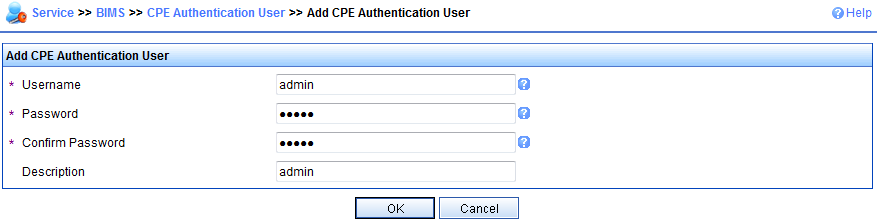
Enter the username and password for authentication to the ACS, and then click OK.
Figure 61: Adding a CPE user account
Add device groups and device classes for devices in equipment rooms A and B:
This example assigns all devices to the same device group, and assigns the devices in two equipment rooms to different device classes.
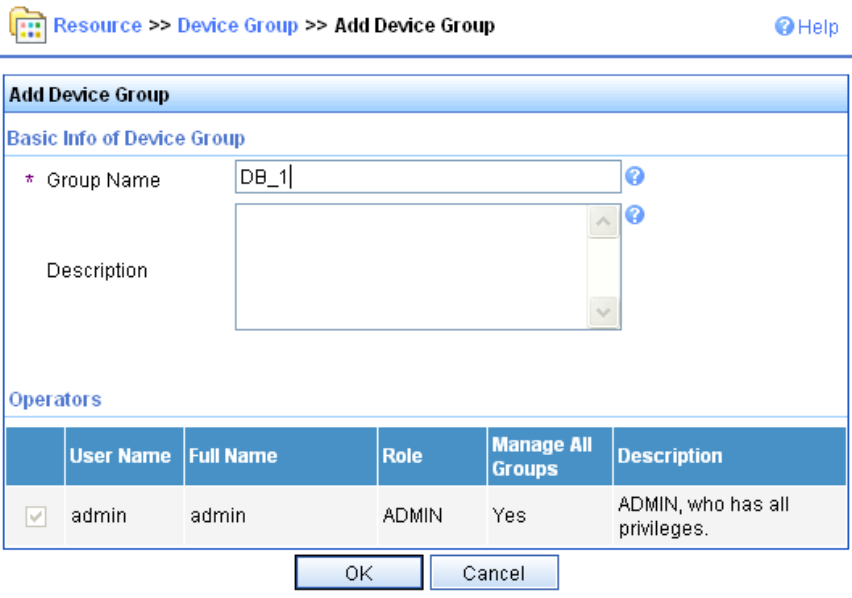
Select Service > Resource > Device Group from the top navigation bar.
Click Add.
On the Add Device Group page, enter a service group name (for example, DB_1), and then click OK.
Figure 62: Adding a device group
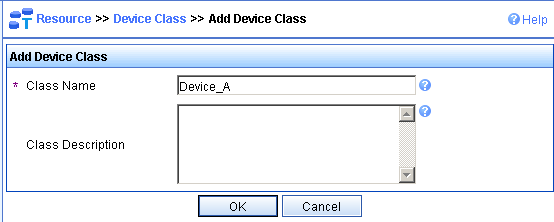
Select Service > Resource > Device Class from the top navigation bar.
Click Add.
On the Add Device Class page, enter a device class name for devices in equipment room A, and then click OK.
In this example, the device class for devices in equipment room A is Device_A.
Figure 63: Adding a device class
Repeat the previous two steps to create a device class for devices in equipment room B.
Add the devices as CPEs:
Select Service > BIMS > Add CPE from the top navigation bar.
On the Add CPE page, enter or select basic settings for device A, and then click OK.
Repeat the previous two steps to add other devices.
Figure 64: Adding a CPE

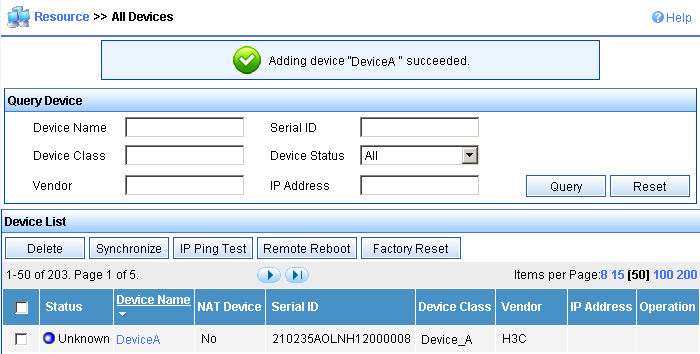
After the CPE is added successfully, a success message is displayed, as shown in Figure 65.
Figure 65: CPE added successfully
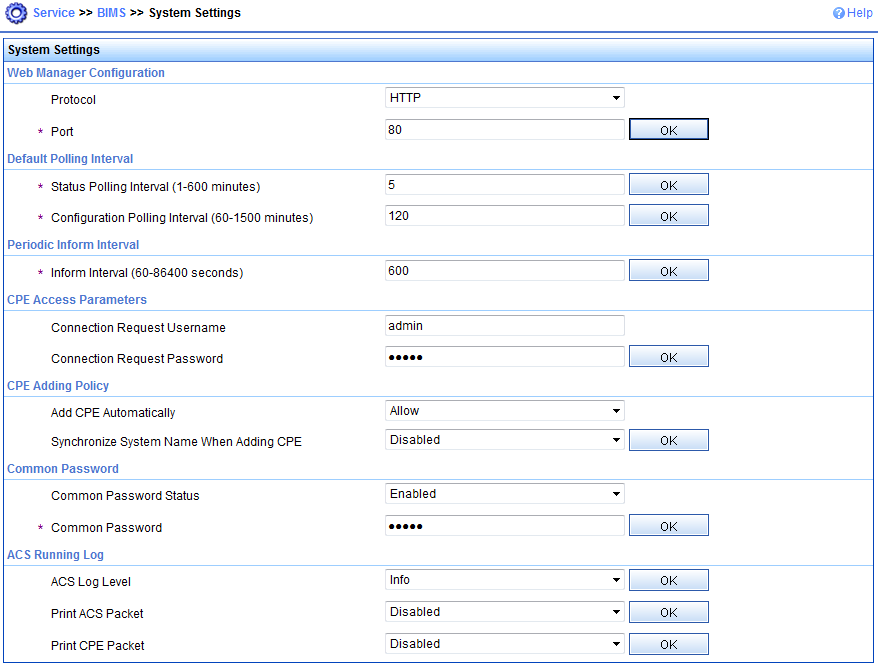
Configure the system settings of the ACS, as shown in Figure 66.
Figure 66: Configuring the system settings of the ACS
Add configuration templates and software library entries for the two classes of devices:
Select Service > BIMS > Configuration Management > Configuration Templates from the navigation tree.
Figure 67: Configuring templates page
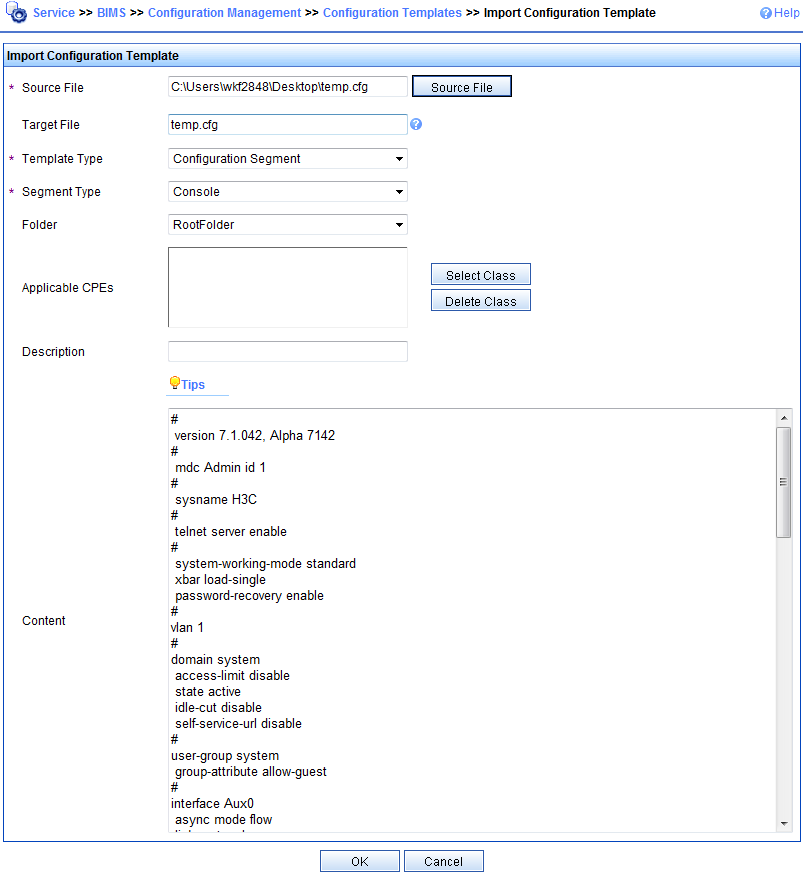
On the Configuration Templates page, click Import….
On the Import Configuration Template page, select configuration template settings for the Device_A device class, add the Device_A class to the Applicable CPEs pane, and then click OK.
Repeat the previous two steps to configure a configuration template for equipment room B's device class.
Figure 68: Importing configuration template
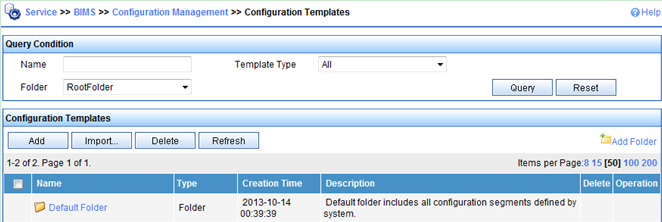
After the configuration template is added successfully, a success message is displayed, as shown in Figure 69.
Figure 69: Configuration templates
Select Service > BIMS > Configuration Management > Software Library from the top navigation bar.
Figure 70: Configuring software library
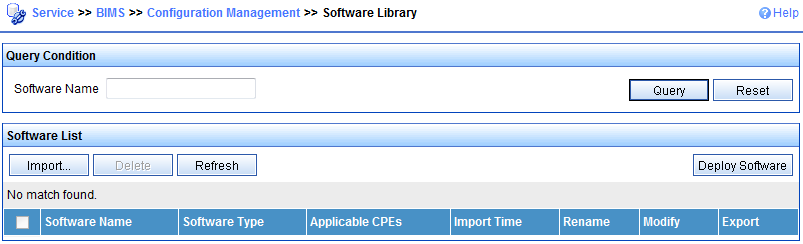
On the Software Library page, click Import….
On the Import CPE Software page, select the software images for the Device_A device class, add the Device_A class to the Applicable CPEs pane, and then click OK.
Repeat the previous two steps to configure a software library entry for equipment room B's device class.
Figure 71: Importing CPE software

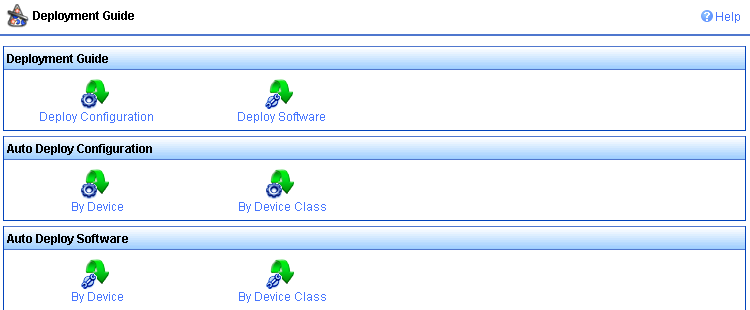
Add auto-deployment tasks:
Select Service > BIMS > Configuration Management > Deployment Guide from the top navigation bar.
On the Deployment Guide page, click By Device Class in the Auto Deploy Configuration pane.
Figure 72: Deployment Guide
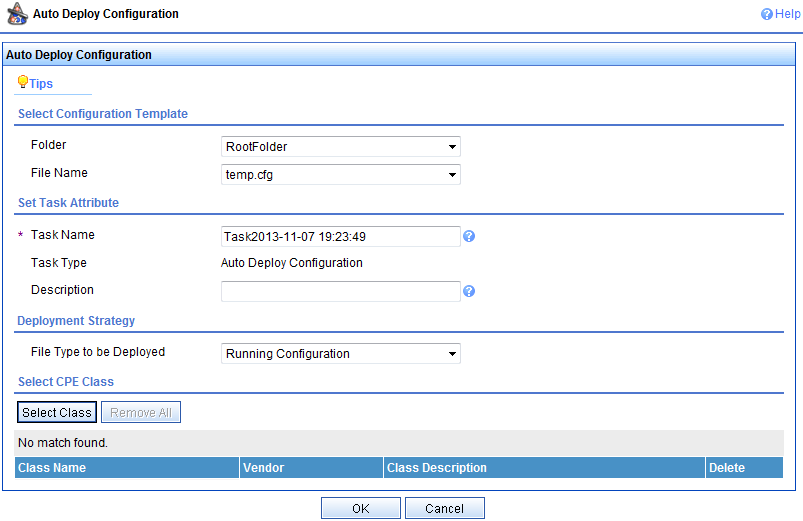
On the Auto Deploy Configuration page, click Select Class.
Figure 73: Configuring auto deployment
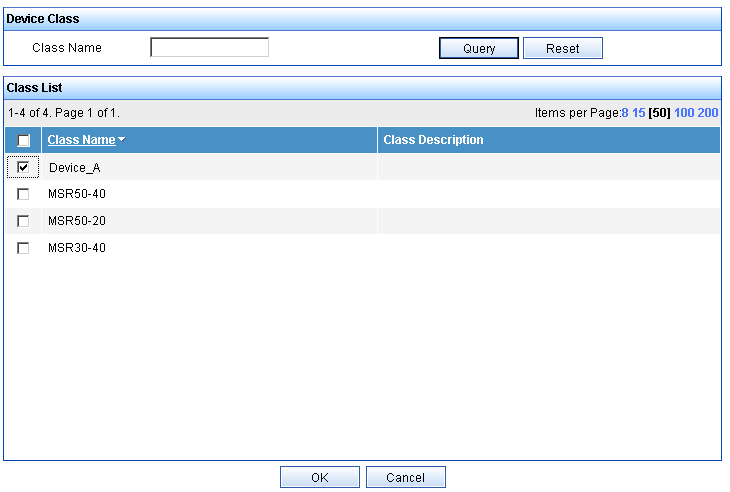
On the Device Class page, select Device_A, and then click OK.
Figure 74: Selecting device class
On the Auto Deploy Configuration page, click OK.
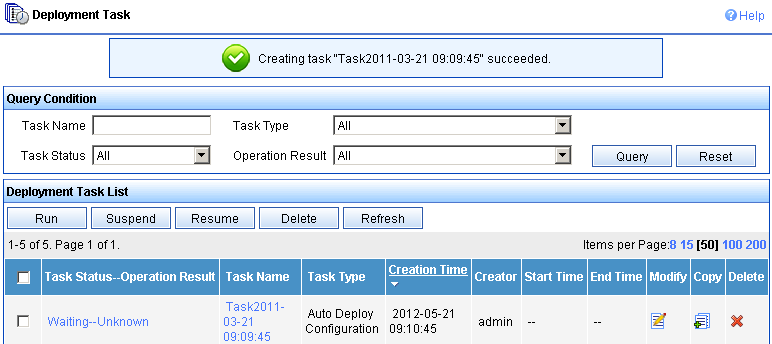
A success message is displayed, as shown in Figure 75.
Figure 75: Deployment task
Add a deployment task for devices in equipment room B in the same way you add the deployment task for the devices in equipment room A.
Configuring the DHCP server
In this example, an HPE device is operating as the DHCP server.
Configure an IP address pool to assign IP addresses and DNS server address to the CPEs. This example uses subnet 10.185.10.0/24 for IP address assignment.
# Enable DHCP.
<DHCP_server> system-view
[DHCP_server] dhcp enable
# Enable DHCP server on VLAN-interface 1.
[DHCP_server] interface vlan-interface 1
[DHCP_server-Vlan-interface1] dhcp select server
[DHCP_server-Vlan-interface1] quit
# Exclude the DNS server address 10.185.10.60 and the ACS IP address 10.185.10.41 from dynamic allocation.
[DHCP_server] dhcp server forbidden-ip 10.185.10.41
[DHCP_server] dhcp server forbidden-ip 10.185.10.60
# Create DHCP address pool 0.
[DHCP_server] dhcp server ip-pool 0
# Assign subnet 10.185.10.0/24 to the address pool, and specify the DNS server address 10.185.10.60 in the address pool.
[DHCP_server-dhcp-pool-0] network 10.185.10.0 mask 255.255.255.0
[DHCP_server-dhcp-pool-0] dns-list 10.185.10.60
Configure DHCP Option 43 to contain the ACS URL, username, and password in hexadecimal format.
[DHCP_server-dhcp-pool-0] option 43 hex 0140687474703A2F2F6163732E64617461626173653A393039302F616373207669636B79203132333435
Configuring the DNS server
Map http://acs.database:9090/acs to http://10.185.1.41:9090/acs on the DNS server. For more information about DNS configuration, see DNS server documentation.
Connecting the CPEs to the network
# Connect the CPEs to the network, and then power on the CPEs. (Details not shown.)
At startup, the CPEs obtain the IP address and ACS information from the DHCP server to initiate a connection to the ACS. After the connection is established, the CPEs interact with the ACS to complete autoconfiguration.