Configuration procedure
Before performing the following configuration, make sure the device and the host are accessible to each other via available routes, and the IPv6 addresses of the interfaces are configured as shown Figure 77.
This configuration may vary with DNS servers. The following configuration is performed on a PC running Windows Server 2003. Make sure that the DNS server supports the IPv6 DNS function so that the server can process IPv6 DNS packets, and the interfaces of the DNS server can forward IPv6 packets.
Configure the DNS server:
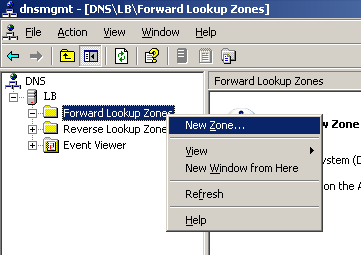
Select Start > Programs > Administrative Tools > DNS.
The DNS server configuration page appears, as shown in Figure 78.
Right-click Forward Lookup Zones, select New Zone, and then follow the instructions to create a new zone named com.
Click OK.
The mapping between the IP address and host name is created.
Figure 78: Creating a zone
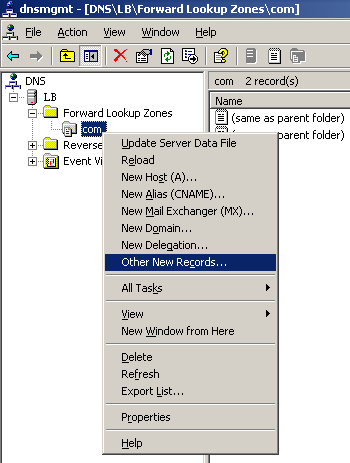
On the DNS server configuration page, right-click zone com and select Other New Records.
Click OK.
The mapping between the IP address and host name is created.
Figure 79: Creating a record
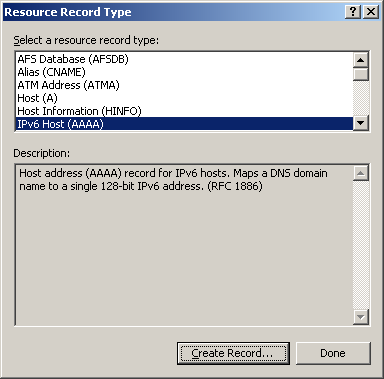
On the page that appears, select IPv6 Host (AAAA) as the resource record type, and click Create Record.
Click OK.
The mapping between the IP address and host name is created.
Figure 80: Selecting the resource record type
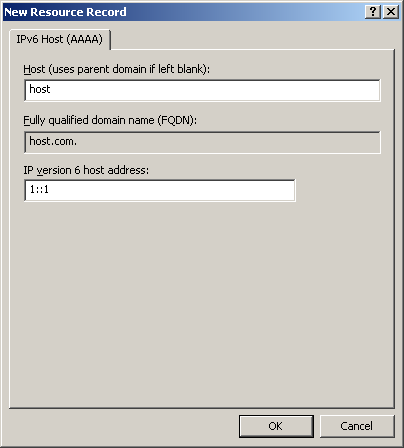
On the page that appears, enter host name host and IPv6 address 1::1.
Click OK.
The mapping between the IP address and host name is created.
Figure 81: Adding a mapping between domain name and IPv6 address
Configure the DNS client:
# Enable dynamic domain name resolution.
<Device> system-view
[Device] dns resolve
# Specify the DNS server 2::2.
[Device] dns server ipv6 2::2
# Configure com as the DNS suffix.
[Device] dns domain com