Installing the IMC platform
In the Select Locale dialog box, select the Custom installation type, and then click OK.
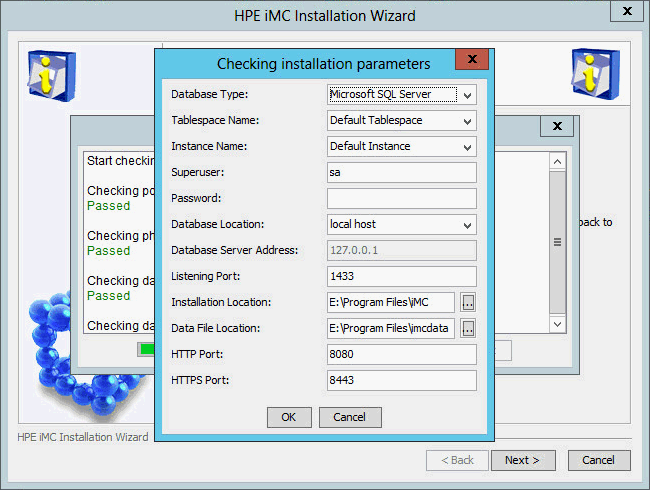
The Checking Database Connectivity dialog box opens, as shown in Figure 5.
Figure 5: Checking Database Connectivity
Configure the parameters as needed. For descriptions about the parameters, see "Checking the installation environment."
Click OK.
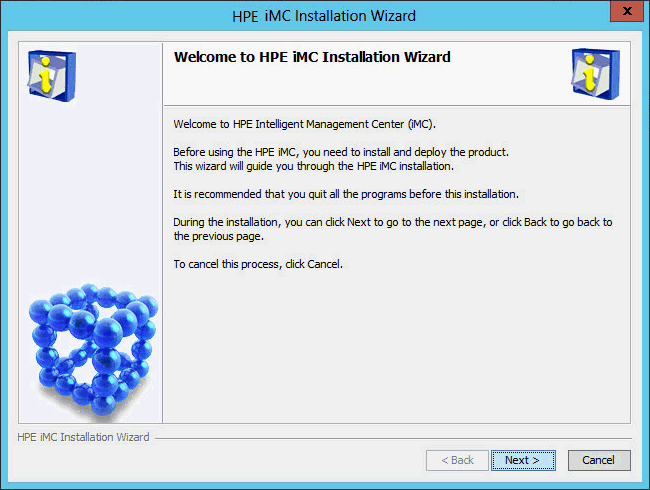
After the checks are passed, the IMC installation wizard opens, as shown in Figure 6.
Figure 6: IMC installation wizard
Click Next.
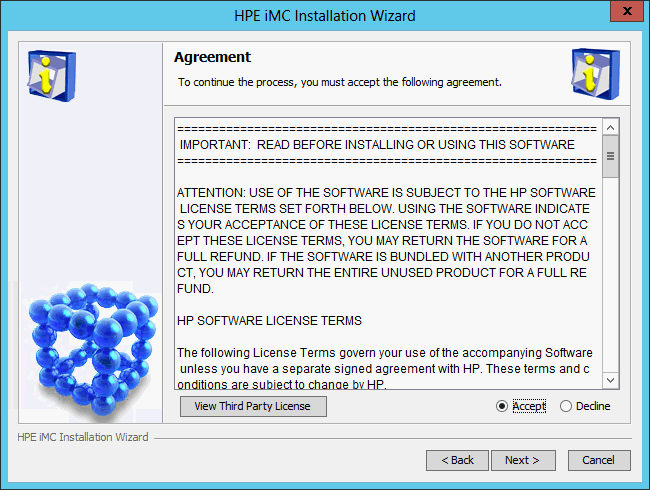
The Agreement page opens, as shown in Figure 7.
Figure 7: Agreement page
Read the license agreement, select Accept, and then click Next.
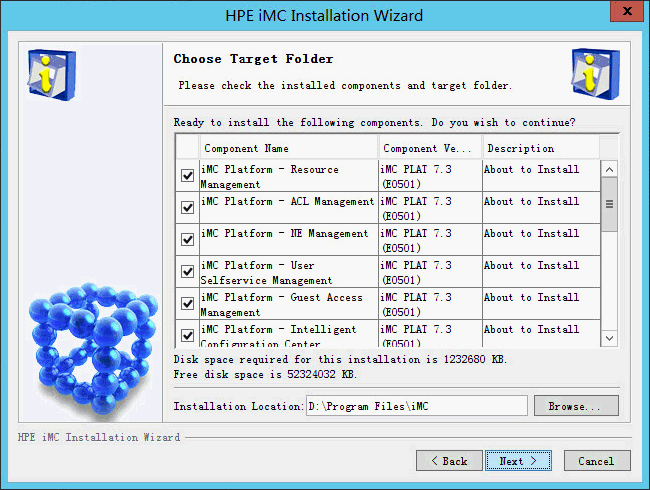
The Choose Target Folder page opens, as shown in Figure 8.
Figure 8: Choose Target Folder page
Select the components you want to install and specify a local path as the installation location.
The installation program examines whether the specified installation path contains files. If the path contains files, a message is displayed. Click OK to delete the files.
The default installation location is X:\Program Files\iMC, where X is the drive letter of the disk that has the largest amount of free space.
![[NOTE: ]](images/note.png)
NOTE:
If you install the IMC platform on a Linux host, do not use a symlink path as the installation location.
On Linux, the default installation location is /opt/iMC.
Click Next.
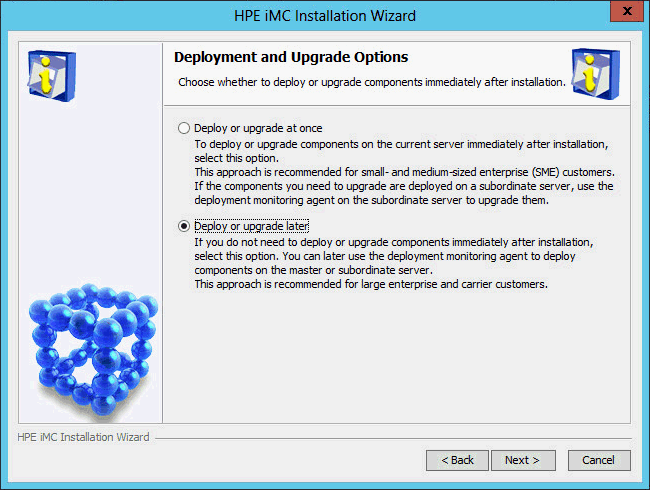
The Deployment and Upgrade Options page opens, as shown in Figure 9.
Figure 9: Deployment and Upgrade Options page
Select Deploy or upgrade at once or Deploy or upgrade later. In this example, select Deploy or upgrade later.
Click Next.
The Installation Summary page opens, as shown in Figure 10.
Figure 10: Installation Summary page
Verify the installation summary, and then click Install.
After the installation is complete, the Installation Completed page opens, as shown in Figure 11.
Figure 11: Installation Completed page
Select Open deployment monitoring agent, and then click Finish.
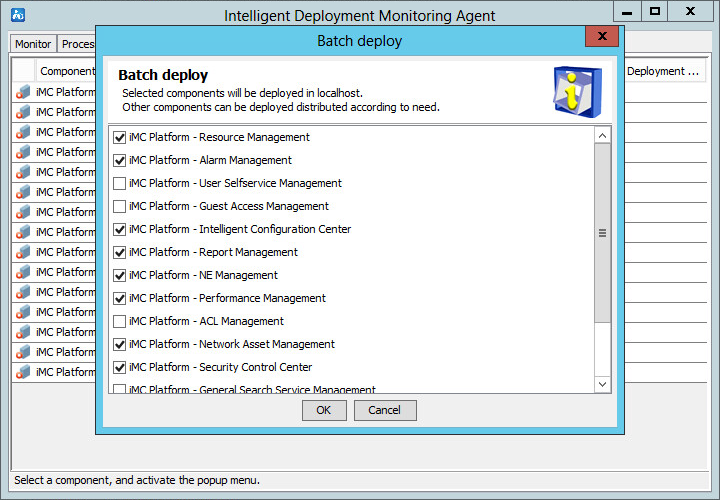
The system automatically starts the Intelligent Deployment Monitoring Agent and displays the Batch deploy dialog box, as shown in Figure 12.
Figure 12: Batch deploy dialog box
Select the components to be deployed, and then click OK.
The Database Configuration page opens, as shown in Figure 13.
Figure 13: Database Configuration page
Enter the password of the superuser.
Set the data file location.
You must first create a folder to save data files on the database server.
Make sure the specified data file location is on a readable and uncompressed disk drive and does not include any files.
Click Next, and then click OK in the confirmation dialog box that opens.
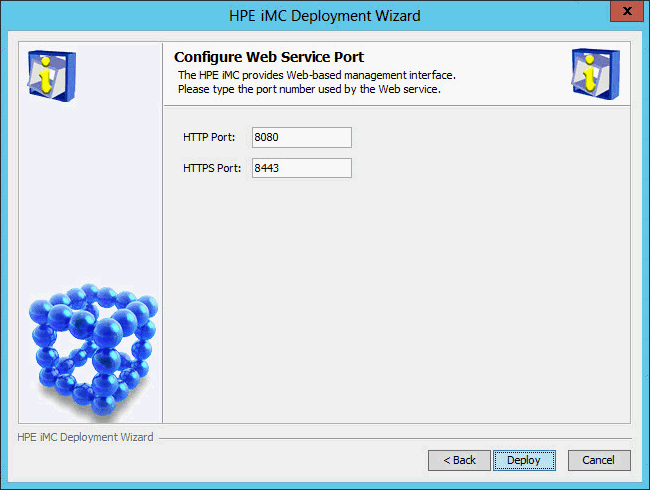
The Configure Web Service Port page opens, as shown in Figure 14.
Figure 14: Configure Web Service Port page
Enter the HTTP and HTTPS port numbers. This example uses the default port numbers 8080 and 8443.
If you specify other port numbers, make sure the specified ports are not used by other services.
Click Deploy.
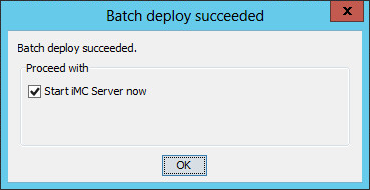
After the deployment is complete, the Batch deploy succeeded dialog box opens, as shown in Figure 15.
Figure 15: Batch deploy succeeded dialog box
Click OK.