Viewing, enabling, and modifying the TimeP protocol (Menu)
Procedure
From the Main Menu, select:
2. Switch Configuration
1. System Information
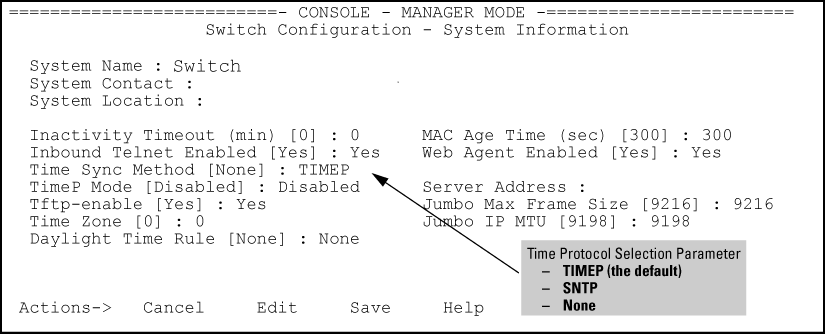
System Information screen (default values)
Press
[E] (for
Edit).
The cursor moves to the
System Name field.
Move the cursor to the
Time Sync Method field.
If
TIMEP is not already selected, use the
Space bar to select
TIMEP, then move to the
TIMEP Mode field.
Do one of the following:
Use the
Space bar to select the
DHCP mode.
Move the cursor to the
Poll Interval field.
Go to step 6.
Enabling TIMEP or DHCP
Time Sync Method [None] :   TIMEP
TimeP Mode [Disabled] :     DHCP
Poll Interval (min) [720] : 720
Time Zone [0] :             0
Daylight Time Rule [None] : None
Use the
Spacebar to select the
Manual mode.
Move the cursor to the
Server Address field.
Enter the IP address of the TimeP server you want the switch to use for time synchronization.
NOTE:
This step replaces any previously configured TimeP server IP address.
Move the cursor to the
Poll Interval field, then go to step 6.
In the
Poll Interval field, enter the time in minutes that you want for a TimeP Poll Interval.
Select
[Enter] to return to the
Actions line, then select
[S] (for
Save) to enter the new time protocol configuration in both the startup-config and running-config files.